SUBWOOFERS BRO.
Ok, well one subwoofer. Add a little boom boom to your vroom vroom.
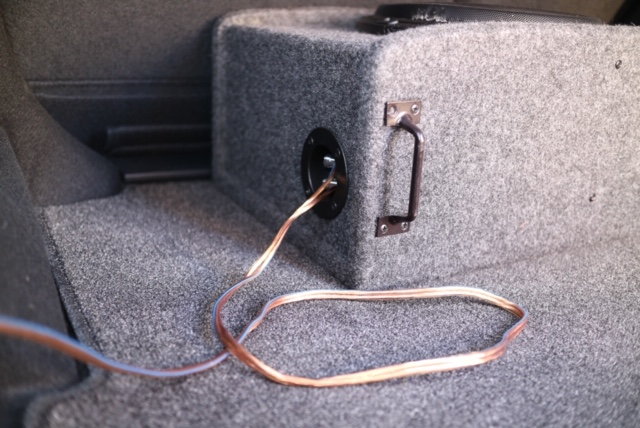
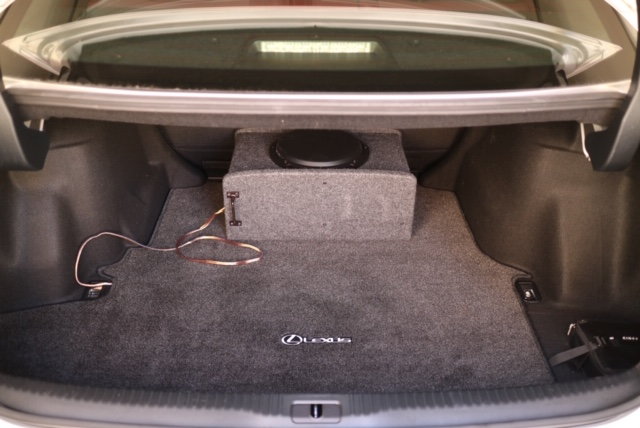
Someone requested some info on this. Installed a JL 12" subwoofer and Rockford Fosgate Amp to my 2016 IS200t non-ML system.
It sounds GREAT and I haven't even tuned it yet. The system before was meh and really this new system sounds absolutely great. I'm not really wanting to upgrade anything else now. For some reason just adding a subwoofer has enriched the sound quality. I thought the trunk being sealed would not let any bass in but boy was I wrong. HUGE noticeable difference.
Here's how I did it:
I literally bought everything from Amazon.
Amp I used: https://www.amazon.com/Rockford-Fosgate-R500X1D-1-Channel-Amplifier/dp/B00BF6HYDE/
Subwoofer I used: http://amzn.to/2cyXoZL -- Looks like it was replaced with a newer model: https://www.amazon.com/JL-Audio-CS110TG-TW3/dp/B00IF9IJ4W
12V wiring kit I used: https://www.amazon.com/BOSS-Audio-Amplifier-Installation-Wiring/dp/B000FKP7TY/ref=sr_1_1?keywords=BOSS+Audio+Systems+KIT2+8+Gauge+Amplifier+Installation+Wiring+Kit+-+A+Car+Amplifier+Wiring+Kit+Helps+You+Make+Connections+and+Brings+Power+to+Your+Radio%2C+Subwoofers+and+Speakers&qid=1572460560&sr=8-1
T-Taps: http://amzn.to/2bOCu6t
You'll also need:
Some quality needle nose pliers for squeezing the crimps. Everyone should have these.
Wire strippers/cutters (or you can use a nail clipper)
1/4" drive ratchet with deep socket 10mm
Electrical tape (optional)
Zip ties (optional, recommended)
Allen key or allen key screwdriver for the fuse holder. I think the correct size tool MAY come with the amp. Not sure I forget.
Flashlight
Time: 2-3 hours.
1) Disconnect negative terminal on battery. You'll be messing around with a (probably) very expensive amp. So don't risk it.
2) Pop trunk. Pull out trunk mat, spare tire lid, right side tool kit foam, and right-rear latch which is secured by a 10mm nut. Lift the panel on the right side up and out. Below it is the factory amp.
3) Remove factory amp and set aside. It is held down by two 10mm nuts. One facing the sky and one under the interior trim facing the front of the car. You'll need a deep socket 10mm. Tilt the amp towards you and look at the large front harness. It has a special black clip you have to unlock and pry upwards then the harness slides out. Use a flashlight and be careful not to break anything. The smaller harness just pulls right out with a push tab like normal. You'll be working with both harnesses. The large harness for the rear speaker signals (4 wires total - green/brown for positives and pink/white for their respective negatives. The negatives are directly below their respective positives. Can't miss them.
4) Take your line level input harness from your amp (assuming you bought the one in my link) and use the T-Taps to tap into the rear speaker signal wires on the large harness. These are unfiltered pre-amp signals for the rear speakers. Exactly what you want. Tip: Tap the wires when you have the black plastic part on the large harness fully locked in the up position. This ensures you have enough room to re-insert the harness into the amp because that black piece has to be fully up to go back in. Thanks to RamAir, here are the wires you need to tap on the amp: L+ Beige; L- Pink; R+ Green; R- White.
5) Now it's time to run your power and ground and remote wire. (you can do this step before #4 if you wish) doesn't matter. You'll need to run your 8 gauge power wire from the positive terminal on the battery. The wire in the kit I linked comes with everything you need, including fuse and terminals. Go inside your car and pull down the passenger footwell panel with your fingers. There's no screws. Pull it down. Don't be scared. Now look under with a flash light. There's a large rubber grommet that is on the firewall. You can see a little hole for something to go in. That's where you'll put your wire. Use a tool, wire, whatever to poke a hole in that unused rubber hole. Push your 8 gauge power wire through and pull up enough slack on the other side that you can attach to the battery. Just let it sit there. DO NOT CONNECT TO BATTERY UNTIL THE VERY LAST STEP. You don't want to short anything out. Now run the power wire down the passenger side of the car. I recommend pulling up the passenger front and rear side sill plastic scuff panels. Pull outwards towards drivers side gently using your fingers then upwards. These panels come out very easy. You should not have to fight them. Then tuck the 8 gauge power wire neatly inside and you can simply tuck in under B-pillar panel using fingers. Pull taught from the rear to make sure the wire is securely under the B-pillar panel. Then pull up back cushion of seat to get more access. Then fold down passenger side seat back. Now you can route your wire to the trunk. Avoid any sharp metal. Route the wire carefully and secure with zip ties where necessary. Run wire to roughly where your subwoofer will be and cut to size. Now put your interior back together using your fingers. Easy.
6) For ground wire, I simply used the front right metal latch in the trunk. I had to remove the little lid that comes down. Sliced it off with a razor blade. Oh well. That latch grounds securely into the chassis--I confirmed. As for your remote turn-on wire, on my 2016, it was the small brown wire in the corner of the SMALL harness. Confirm with multimeter. You want 12V when car is ON and nothing when off. Connect your amp to speaker cables, your power, ground, remote and button trunk back together. Now the last part, connect the fuse and ring terminal to positive side and reconnect your ground wire. Mine worked on the first try! Double-triple check everything you do ESPECIALLY the connections. Always work safely and if you do not feel comfortable or experienced enough, consult a professional shop to assist you!
Edit: I relocated the amp to the left side and used a ground right below the driver's tail light on the inside of the trunk. There's a 10mm bolt you remove. Perfect!
Enjoy your sweet sounding non-ML system now!! =)
These are the two harnesses you'll use that plug into the factory amp. Large harness for speaker taps (info above) and small harness for the remote turn on wire. For 2014/2015 cars, it may be blue or white I've read. Confirm with multimeter. On my 2016, it was the light brown wire in the corner.

Added pics:


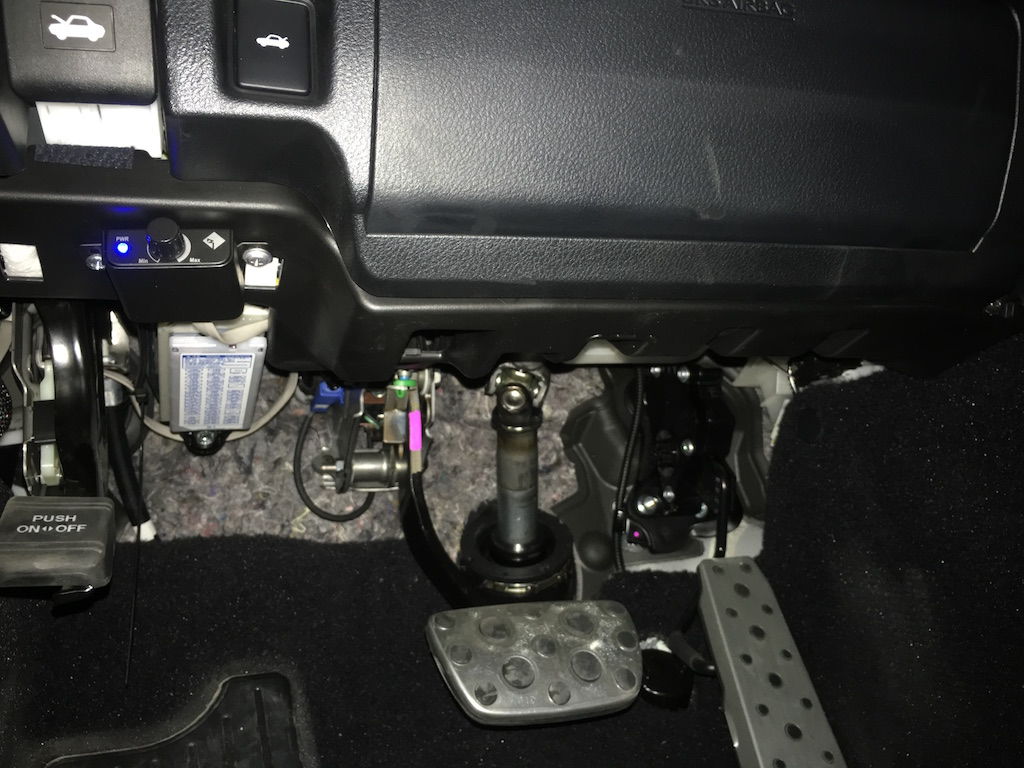
This is the base control knob mounted on the left side of the car. This literally took me 10 min from start to finish. Extremely easy route the wire. Just tuck with your fingers. Just zapped the screws right in the plastic panel. Nothing above it. Make sure you use tiny screws. The kit comes w/ them. Nevermind the zip tie hanging down. I trimmed everything up nicely after I took the pic. Used two zip ties to secure the bass control wire to some factory wiring harnesses up there. Make sure you go behind the brake pedal so you don't interfere with its operation.
I'll post pics of the relocated amp to the left side along w/ updates on install. Wires ran a bit differently, etc. Cleaner--no exposed wires. Remove box in one easy step. Still the same concept overall though.

No comments:
Post a Comment
Let Mango know what you think!